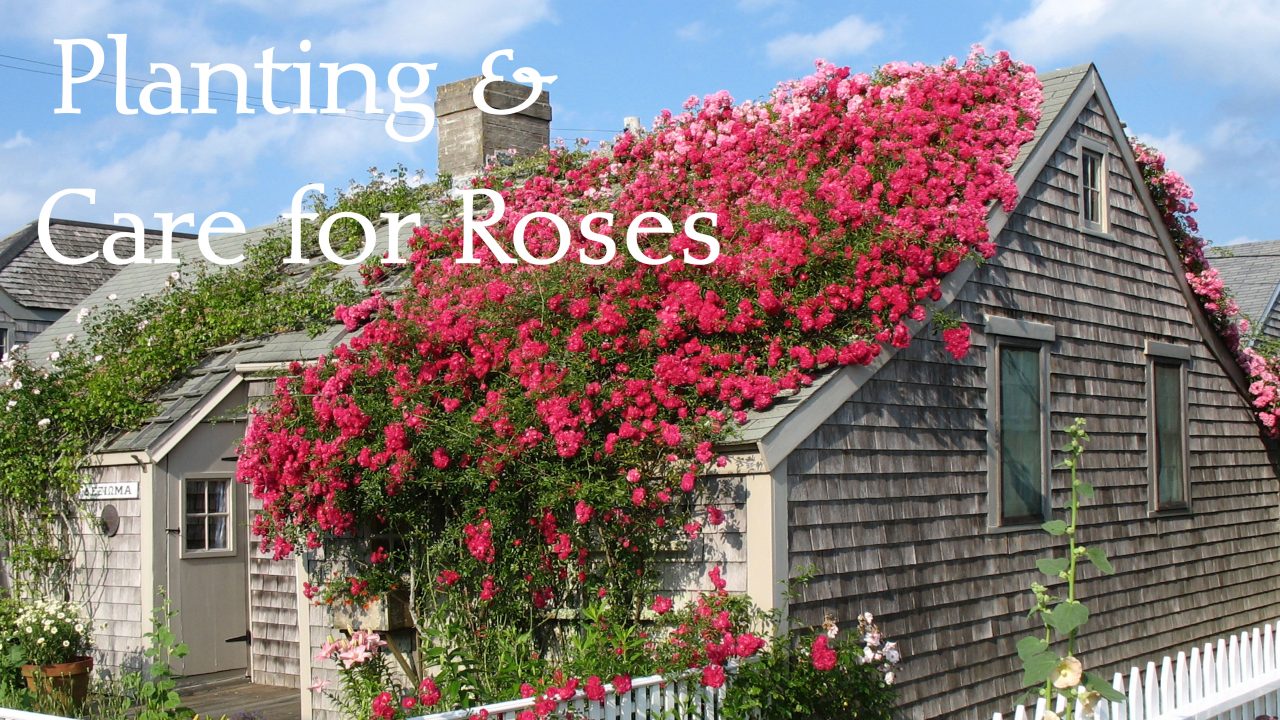
Planting & Care for Roses
by Thomas L. Mazzei
I Did Promise You A Rose Garden
PURCHASING PLANTS
The first step in planning a rose garden, is one of a personal nature. You need to determine what you want to look at. The type, color, classification or variety of roses you purchase should satisfy your own taste. Some people send for catalogs from various nurseries and make their choices solely from them. Winter is a good time to start planning a rose garden, as it will allow you time to order for early spring planting. Most nurseries ship to coincide with the planting season in your climatic zone. In the climatic zone of Cape Cod and the Islands it is not considered wise to select a cultivar with less than a 7.0 ARS (American Rose Society) rating as you will have little success and a lot of maintenance.
Before buying any rose bushes, contact the American Rose Society and purchase their Handbook for Selecting Roses. This booklet lists all cultivars, plus classification and ratings for all known roses. If you decide to purchase a potted or bare root rose bush, always buy a #1 rated bush. Some are rated #1.5 or #2 – do not buy them. Often, the bush will have a metal tag attached giving its classification or rating. A #1 rated bush will have three canes 3/8 of an inch in diameter and 18 inches high; Floribunda canes should be 15 inches high and climbers 24 inches high. There can be just two canes, so long as the third cane has a lateral cane growing from the main cane, no higher than three inches above the bud union. Try to find a plant having at least three canes emanating or grafted on the bud union. If you are fortunate to find one with more canes and all are healthy, obviously this is better.
Try to ascertain the root status on potted bushes purchased from your local nursery. Make certain the lower root system has not been cut off to accommodate the size of pot it is in.

PLANT SELECTION
There are many varieties of roses, with the following to choose from:
Hybrid Teas: Hybridizing introduced many new varieties of roses, some bearing the resemblance of their ancestors. The era of the Modern Rose began in 1867 when the first “Hybrid Tea” was introduced. It proved to be the ultimate in roses. It had large blossoms, high centers, elegance of the utmost caliber, fragrance to varying degrees, and the capability of blooming repeatedly during the growing season.
In 1867 roses were divided into two different types. Roses developed before 1867 (as well as hybrids developed within that particular group) are termed “Old Garden Roses” (OGR). Roses after 1867 are termed “Modern Roses.” They are direct descendants of the original tea roses. This type is most sought after for cutting. They produce beautifully shaped flowers with large pointed buds on long stems. They are primarily grown to produce single buds. The plants grow to about five to eight feet in height. In the event you may venture into exhibiting in rose shows, keep in mind that only Hybrid Teas are eligible for Queen of Show.
Grandiflora: As the name implies, it means grand flower. This variety is a cross between the Hybrid Tea and the Floribunda and retains the qualities of both species. The Grandiflora produces large clusters of flowers on long stems. They are usually tall and slender in their growth pattern
Climbers: Grown on Nantucket on the rose-covered cottages in ‘Sconset, they usually require the support of a trellis, arbor, post, pillar, lattice or fence. Climbers are usually very prolific in flowering, generally very hardy and produce canes from eight to twenty feet in length. If you purchase climbers, prepare ahead for the supporting structure and secure the canes to the support.
Antique Roses: This class of rose usually sends forth blooms only once in the growing season. Because they are vigorous and disease-resistant they are well worth considering in an area where low maintenance and tall growth is desired. They can be used as specimen plantings or hedges due to their large size. They commonly include China, Musk, Noisettes, Polyanthas, Tea and Species roses, with most having fragrant, large old-fashioned blooms.
David Austin Roses: David Austin has developed an ever-blooming hybrid strain often called Old English Roses, Shrub, Heritage or Old Garden Roses. They are commonly sold as David Austin roses. The David Austin rose is known for its strong fragrance and large double blooms. Like the Antique rose or Old Garden rose, it is just as disease-resistant. The David Austin varieties resemble the Damask, Alba, and Gallica roses of by-gone days, the difference being their propensity for repeated blooming and the availability of a wider range of color selection.
Shrub: (Classic and Modern) The Shrub rose is a new class of rose that overlaps the Antique and Modern rose. It has five popular subdivisions within it; hybrid Kordesii, hybrid Moyesii, hybrid Musk, hybrid Rugosa and Shrub and now includes the unique group of roses by David Austin. They are recurrent bloomers and many have fragrances.
Floribundas and Polyanthas: As the name indicates they are distinguished by their mass of medium size flower clusters on numerous stems. The Floribunda rose usually presents a nice cut flower. They are a bushy rose and grow from two feet to six feet in height. The Polyanthas are usually a smaller sized bush bearing smaller flowers. Both species present themselves well as an excellent border if mass coloring is desired.
Miniature Roses: Miniature roses are developed on their own roots. Minis come in many blooms and colors and they take up very little space. Their growth is not more than two feet high unless they are the climber variety. They come in many varieties including climbers, ground cover and tree varieties.
SITE LOCATION
In order to grow roses well and to produce the most elegant flowered blooms possible, it is necessary to provide the planting area with at least six hours of good strong sunlight. The best location is one that faces directly south. This allows the rose bush to build strong canes and healthy leaf growth.
To determine this location, observe where the sun is located in your area at noon. Face the sun directly so as to cast a shadow directly behind you. This will indicate a directly south facing location. Extending your arms outward at the shoulder, your left arm will point to the east direction of your planting, your right arm, the west direction. Using a string or garden hose, lay out the intended planting area using the determined directions. Consider that any shadows from trees, buildings, fences, shrubs, etc. will have an effect on the amount of strong sunlight the planting area gets.
When an approximate location has been determined, plan the layout of your plantings on paper. If a rose bed is being planned, a limit of two rows is recommended. Stagger the plants from front to back; avoiding a soldier pattern of one rose bush behind the other because the back plant will not get adequate sunlight. Three feet between plants allows good air circulation and helps early morning dew, rain and lawn sprinkler water to dry quickly. This will help prevent diseases such as black spot and powdery mildew. Try to avoid root areas of surrounding trees and shrubs since they will compete for water and fertilizer. If roots from trees and shrubs are present, install a barrier around the outer edge to deter invasion into the rose bed.
It is also important that your plantings be in a spot where adequate care can be provided. Make sure each bush can be reached for mulching, cultivating, watering, pruning and is in a spot where diseases and insects will be noticed. If a building or shrubs are located on the northerly side (behind and a fair distance in back of the garden), it will help protect the roses by acting as a windbreak from cold and drying winter winds during the dormant season. Do not plant roses under eaves or gutters of a sloping roof. Water, sliding snow, slush and ice will badly damage a rose bush. Planning a rose bed is almost the same as planning an outdoor living area for enjoyment by you and your guests. Thoughtful planning will avoid problems concerning care and future expansion.
SOIL AND HOLE PREPARATION
The most important part in growing roses is the size and depth of the initial hole. It may seem like unnecessary spadework, but it will save a lot of extra work in the future. Not enough emphasis can be placed on this. It has been said many times, “You don’t plant a $25 plant in a 25 cent hole.”
Roses will grow well in almost any soil that will support other flowers or garden plants. Soils can range anywhere from sandy to heavy clay. While roses love plenty of water, they do not like wet feet. It is best to determine the soil and draining conditions well in advance of the intended planting date. Preparations should begin as soon as the earth will allow, when the frost is out of the ground, the soil is not muddy and soil temperatures are approaching 50º Fahrenheit.
A wake-up bell for opening a rose garden, pruning and planting roses is the forsythia bush. As soon as the buds are starting to form on the forsythia bushes in your yard, start to get busy. This signifies the beginning of your area’s microclimate. Best results for preparing to plant roses should be done in the fall of the prior year. This allows enough time for the soil to settle and to adjust the pH of the soil. To determine the soil and draining conditions of the site, dig a hole 24 inches deep by approximately 24 to 30 inches wide for an individual planting and accordingly larger for a rose bed. Remove any large rocks or boulders. Fill the hole with water to the top. All the water should drain out within one hour if adequate drainage is occurring. If this is not happening, dig the hole at least six to 10 inches deeper and refill with coarse stone or gravel to the 24 inch depth. Fill the hole with water again and check drainage again in one hour. In the event water does not drain, consider building a raised bed or place leaching field drainpipes in the bottom of the hole on top of the gravel. Cover the pipe with gravel. The rose bush roots usually thrive in the top 12 to 15 inches of soil. The extra depth beyond 18 inches provides enough drainage to keep the roses happy.
The more clay-like your soil is, the more concerned you should be about drainage. Conversely, sandier soil is going to need a greater amount of additives such as peat moss, shredded pine bark, manure and other amendments to retain water. Hopefully the mix of soil removed from the excavation hole will yield the approximate mix of 1/3 each of clay, sand, and loam. The soil mix used in my rose and flower garden plantings is as follows:

Whether you are planting individual plants or a flower bed, the following procedure is recommended. Fill the excavation one half full of the above amended soil mix. If you have access to an abundance of aged manure, add this in: a 50% aged manure, 50% amended soil mix and blend thoroughly. Fill the hole with water and allow it to drain and settle the soil.
With the amended soil, make a cone-shaped mound for each bush to be planted. This procedure is recommended to support the downward and outward growth of the plant, to give it stability and anchor the aboveground growth. It is preferred not to use packaged composted cow manure since the composted mix is usually 1% cow manure and 99% compost. Most garden centers carry the type preferred.
Caution: Do not use fresh cow, horse or chicken manure! It is too hot and will burn the tender root hairs. Use only aged manure.
In the event all of the above ingredients are not available, adjustments can be made by substituting materials to allow a mix of part soil from excavation hole, 1 part peat moss and 1 part shredded pine bark mulch, readily available at most garden centers. Mix in the soil amendments, as above, to the top portion of your soil composition mix as directed.
A reminder: lime needs time to break down in the soil. Regular lime (powdered limestone) will take all winter to break down. It should be used in the fall of the year that rose bed or hole preparations are being made. Pellet limestone can be used in the spring of the year plantings, as it will break down quickly. Do not be concerned if the pH creeps up over 7.0. Experience has shown that after the start of the feeding program the pH adjusts somewhat to the normal range.
If a rose bush that has been growing in one area is transplanted into a hole to replace a plant that has died or is to be put in place where another bush has been growing, it is best to start all over with a new hole mix. In other words, treat the transplant as if it were a new bush.

PLANTING THE ROSE BUSH
The following procedure is used for planting bare root roses. Bare root rose bushes are usually delivered to your planting zone in time for planting the first week of April. Although most nurseries claim to adequately treat the bush before shipping by treating them with a fungicide, the chance does exist that the plants you ordered might not have been treated in the frenzy to fill orders. The possibility of your bush harboring black spot, fungus or spores does exist. For this reason, it is best to sanitize the bush.
The following sanitizing process is a two-step method. Mix the described solutions below in advance of opening up the bare root package.
BLEACH SOLUTION: To sanitize the bare root bush place 15 gallons of water in a plastic barrel. Add 1 cup of bleach and mix thoroughly. Totally submerge the bush in this solution for no more than thirty seconds. Allow the bush and roots to air-dry for 30 seconds.
VITAMIN B-1 SOLUTION: In another barrel, mix a Vitamin B-1 solution following the manufacturer’s directions to make a five gallon solution. Ortho has a plant starter concentrate with a 3-10-3 fertilizer containing an ingredient called naphthalene acetic acid. The B-1 tablets do not contain this ingredient. (If a commercial solution cannot be found, pulverize 10 Vitamin B-1 tablets for five gallons of water. To this B-1 solution add three tablespoons of Miracle-Gro 18-24-16, or three tablespoons of Peter’s 20-20-20 water-soluble solution.) After air-drying the plants of the bleach solution, immerse the roots in the B-1 solution to just above the bud-union for one to two days but no longer. This should give the plants a good head start.
The following preparation may seem hurtful to you, but it is best for the overall health of the plant. Trimming the roots and cutting the canes back are also necessary for a healthy plant. First, trim the roots by cutting off any that are broken or damaged. These damaged areas can provide a place for disease to start. Cut off one-half inch of the remaining root ends. To help the bush send feeder roots from these cuts, dip the cut ends in a rooting powder such as Rootone, a rooting hormone stimulant. This stimulant will aid the roots in their growth and give the plant extra root area for growth.
Next, trim off all dead, diseased and decayed canes. If the plant is to survive, the root system must be able to support that which is above the ground. The root system supplies the plant with water and nutrients for growth. If the canes are twice the size of the root system, the roots will not be able to provide adequate nutrients for good top growth. The resultant growth will be spindly canes. Since the bare root bushes have been in cold storage, the first above freezing temperatures are going to make the plant seem like it is coming out of winter dormancy and all the bud eyes will want to send out growth. In order to have good strong canes, cut the old canes back to six to eight inches above the bud union. All cuts should be 1/4 inch above the closest bud eye facing to the outside from the center of the bush. The cut should be at a 45º angle down slope on the opposite side of the bud eye. New shoots growing from the remaining canes should be cut off. The plant will replace them as future growth begins.
You are now ready to plant! Place the newly trimmed and prepared plant over the cone of soil in your planting area. Gently spread out the roots to cover the sloping mound of soil. Position the bud union at its proper height. Where winter temperatures are severe, the bud union should be placed below the existing soil level. For temperatures starting at 32º plant at ground level. For each 10º downward plant the bud union 1 inch deeper. For example, 32º = ground level, 20º = 1 inch, 10º = 2 inches, 0º = 3 inches, -10º = 4 inches. In my zone, where temps can go to 0º, I plant the bud union 3 inches deep. Climates where the temp is above 32º plant the bud union above ground level. There is a lot of discussion both pro and con as to the depth of planting, but why take the chance of losing a bush.
Holding the plant in position, add the amended soil mix over the roots gently and begin to fill the rest of the hole. When the hole is approximately one half full, water gently with half of the B-1 soaking solution. Allow this to drain and then fill the remainder with amended soil mix to ground level. Form a well around the plant out to the extended root area. Fill this well with the remaining B-1 soaking solution.
To keep the plant from drying out from the winds and sun of early spring, mound soil up to 3/4 of the plant height above ground. Gently water this mound, but do not wash it away. The young plant tissues must be protected at this stage. Water the plant every two to three days for the next three to four weeks. The plant soil should be kept moist, but not to the point of being soggy. The mounded soil should be held to the same conditions. The roots are stretching out to take advantage of the surrounding nutrients available, they need water fed directly to them to complete their task.
DO NOT add any fertilizer until the bush sets its first flower bloom. If you followed directions above there are enough nutrients available to supply the plant to do so.
In the late spring when the top bud eyes have developed two to three inch shoots and small leaflets have appeared, it is now time to remove the mounded soil from around the canes. With one finger gently remove the soil, or use a gentle trickle or stream of water to wash away the soil from the canes, taking care not to disturb or break off any new growth. Leave a little soil on top of the bud union. Subsequent watering and rain will take care of the remaining soil. Watch the condition of the canes as they develop. If the canes are still green and firm and do not show signs of gray or being wrinkled, all is well. Some bushes come out of their dormant stage slower than others do, so just water and watch their progress. Some dieback may occur. If this does happen, just cut back to the nearest bud-eye and water. If any dead or unhealthy growth is pruned in the spring or summer, seal the cut with Elmer’s glue. This will keep the cane borer from entering the
cut cane.
Potted plants purchased from a local nursery should be planted as early in the season as possible to allow the longest period of time for them to become established. Some plants will be in full bloom depending on when they are purchased. Immerse potted plants for one or two days in the B-1 solution prior to planting and allow draining to take place for half a day, to prevent the soil from falling away while planting. Potted plants should have the bud union only sprayed with the bleach solution diluted as directed before. Do Not Spray the Foliage. It is best not to disturb the soil on these plants since feeder hair roots have been established. Plant these bushes as directed on the container using the amended soil mix. Fill the hole with half of the soil mix, water in with one half of the B-1 solution, let the hole drain and refill. Mound up the soil and add the remaining B-1 solution to the welled area. Prune away any damaged, diseased, and dead growth. Remove all prevailing blossoms and buds, prune the bush to half of its existing growth to 1/4 inch above any outward growing five-leaf cluster.
The pruning cut should slope away from the bud eye, above the leaf axle toward the center of the bush. Random pruning could result in blind or dead end canes that will not flower. No fertilizer program should be started until the first bloom appears. Keep the plants watered well.
Your newly planted roses should bloom in about 10 to 12 weeks. Plantings in April should begin to blossom about the third week of June. In the meantime place a two to three inch layer of mulch over the entire bed, also covering the bud union. This will help to conserve moisture, keep the feeder roots cool, and cut down on weed growth. Some rose aficionados recommend snapping off any rose buds so the plant can develop better foliage and root growth. Not I. My preference would be to enjoy that first bloom for all of its beauty and hard work put forward. If cuttings of blossoms are made on a first year bush, all cut blossom stems should be as short as possible. Cut above the first set of five leaves in the first year and allow the bush to grow, using all the available leaves to manufacture food to nourish the bush. Wait until next year for the long stems to be cut. Appreciate what is available in the first year!
Article edited. Original can be found in REVIEW Nantucket, July 2016.